Closets by Liberty
Thanks for coming by. Closets by Liberty™ products are no longer available; however, we're still here to help you! For questions, please reach out to the Liberty Hardware Care Team.
Click on the links below to learn more about our storage systems.
All closet systems
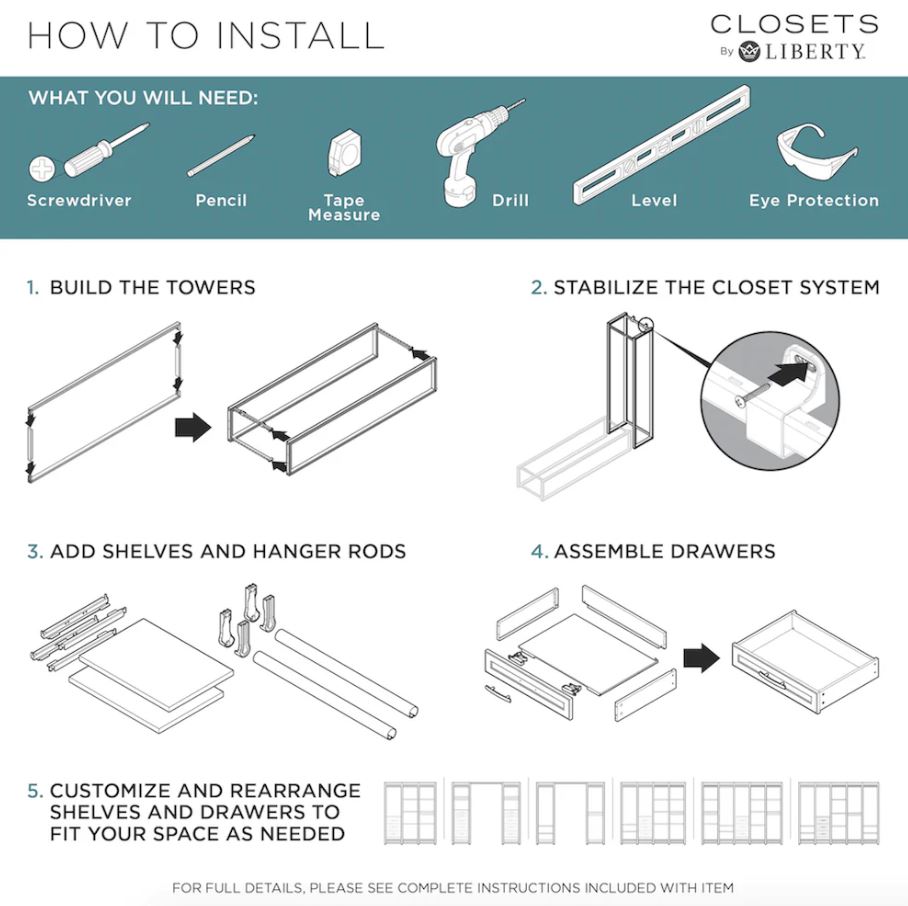
How to install
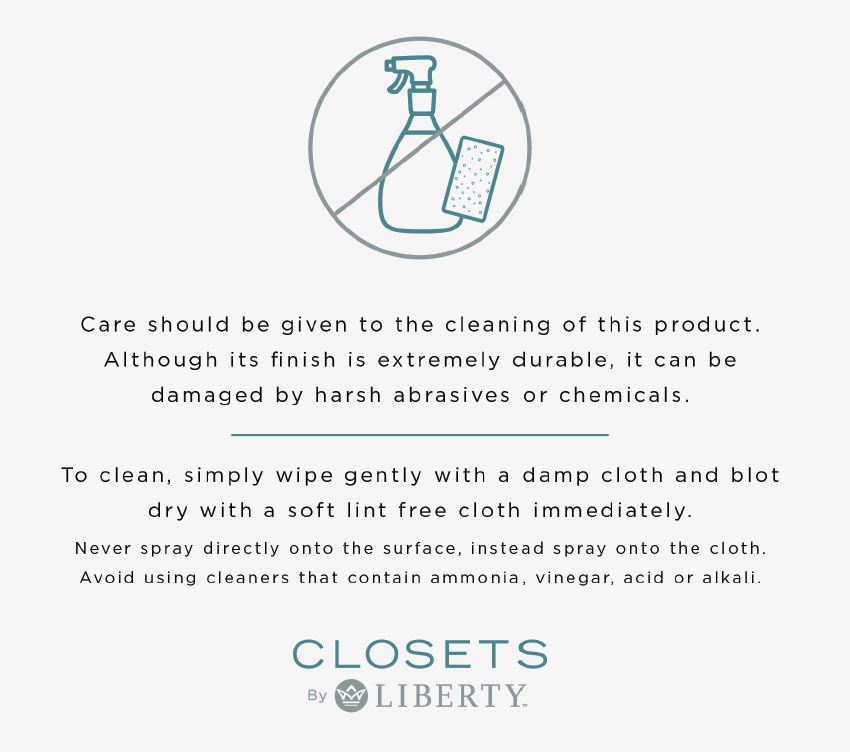
Care & cleaning
Ready size systems
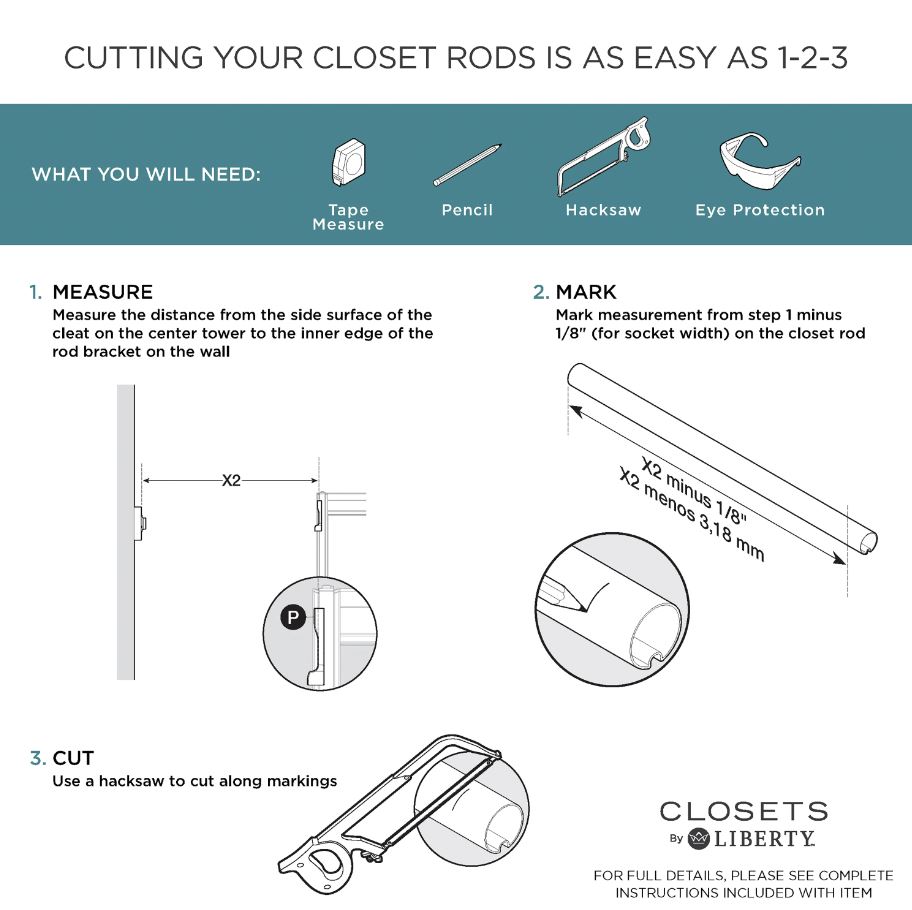
Closet rods
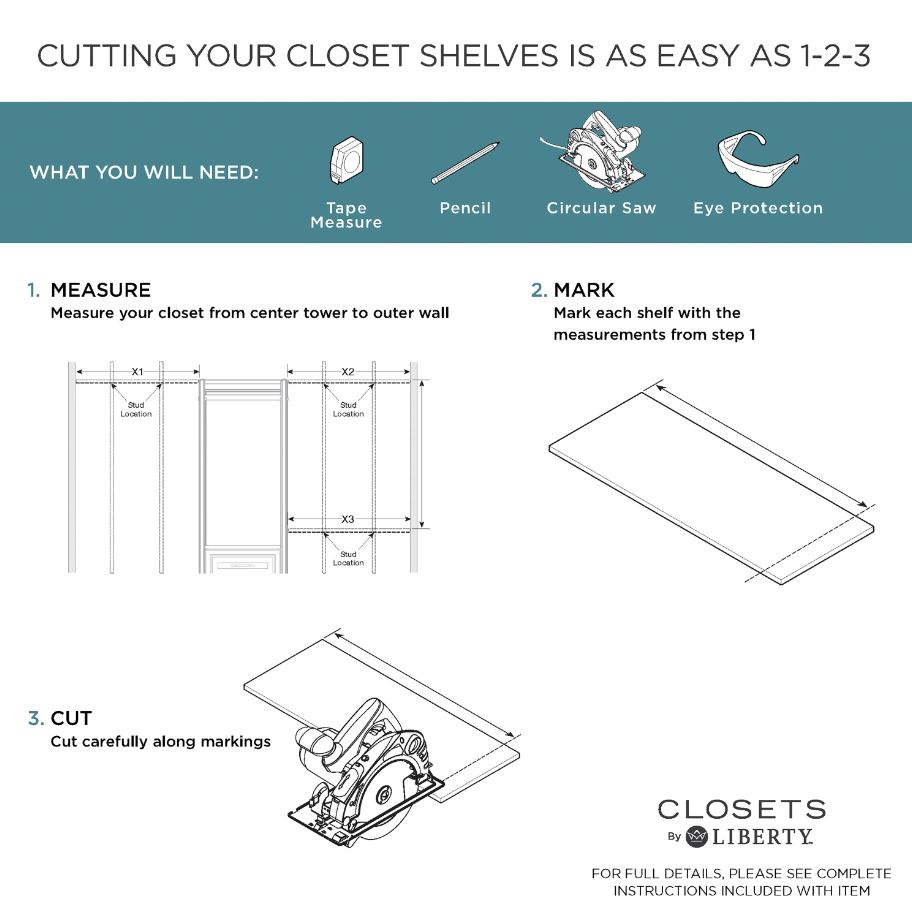
Closet shelves
Hours of operation
M-F 8:00 am - 5:00 pm (ET)Headquarters
Liberty Hardware Mfg. Corp.
140 Business Park Drive
Winston-Salem, NC 27107