10 Tips For Easily Installing Your Closet Organizer
Back to blog
You’ve prepped your closet and ordered the perfect organization system, now the fun really begins! It’s time to assemble and install your Closets by Liberty™ system.
Closets by Liberty™ systems are inspired by homeowners like you and were created to solve real storage challenges. As a result, the organizers are simple to assemble and can be fully installed by just one person in one afternoon.
Below you’ll find 10 useful tips and reminders that will help you move through the installation process seamlessly, making it easier than ever! Be sure to reference your instruction guide for complete details.
TOOLS
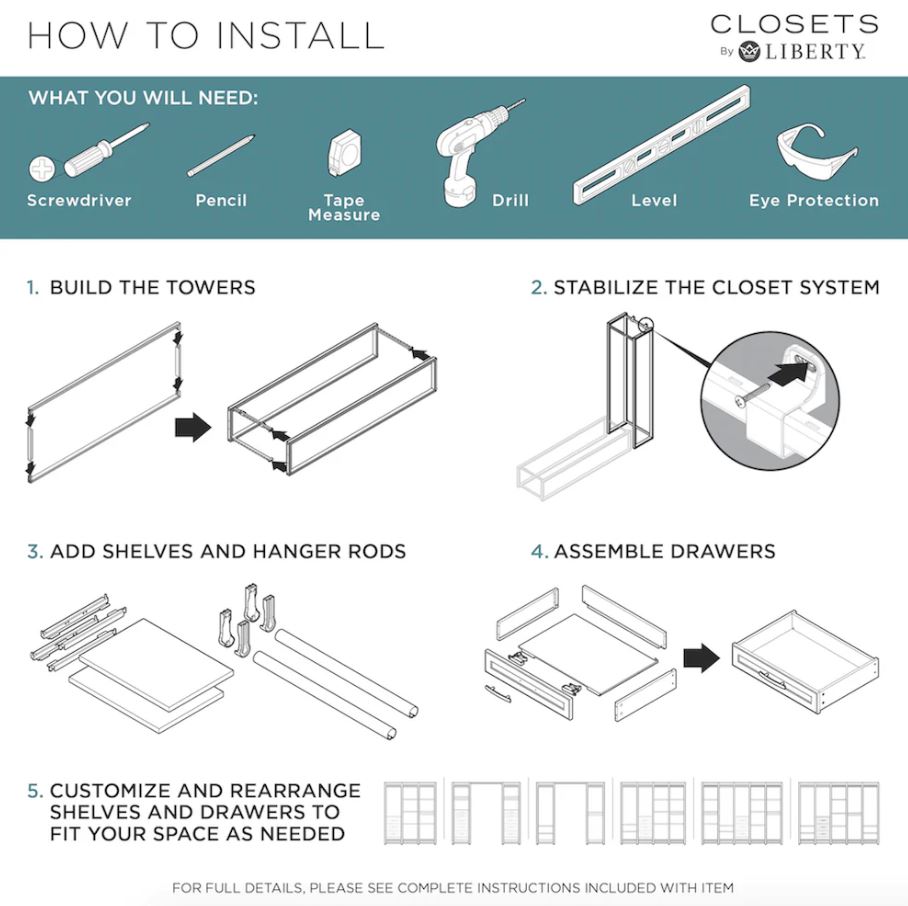
- Before you get started, gather a few household tools. You’ll need a screwdriver, drill, level, and safety glasses. You’ll only need the drill for connecting your system’s anti-tip brackets to the back wall.

VERTICAL SIDES & FRAME
- When assembling your vertical sides to create the frame, you’ll use two horizontal header pieces to connect them. The trick is making sure you know which goes at the top and which goes at the bottom. It’s simple: place the horizontal header with four holes (for mounting hanging bars) at the top and the horizontal header with two holes (for the feet) at the bottom.

STABILIZER BARS
- At the top of each tower, you’ll be adding two horizontal stabilizer bars. At the bottom, you will only add one. Be sure you place the bottom stabilizer bar at the back of the tower.
- The smooth side of these bars should face inside the tower with the open channel facing the wall.

- The top back stabilizer bar should feature two plastic pieces that you will use to attach your system to the wall. Make sure the screw holes face up to create an L shape.

- Don’t forget that the two plastic pieces move left and right, making it easy for you to drill into a stud without moving the whole tower.
BRACKETS
- Brackets for shelves and drawers lock into place with just a click. Slide the bracket into the channel at a 45-degree angle. Then lift up into the channel as you rotate to a 90-degree angle and lock into place. Lifting as you turn is key!

DECORATIVE BUMPERS
- To easily snap on your decorative bumpers, hook them into place at the top first. Then push down and rotate toward the back to cover the entire stabilizer bar and lock the bumper into position.

DRAWERS
- When adding a drawer to a drawer bracket, you need to catch the hole in the back of the drawer with the hook on the back of the drawer bracket. Make sure to push firmly until the hook fully locks into the hole. If it doesn’t catch, you’ll notice your drawer isn’t closing properly.

HANGING RODS
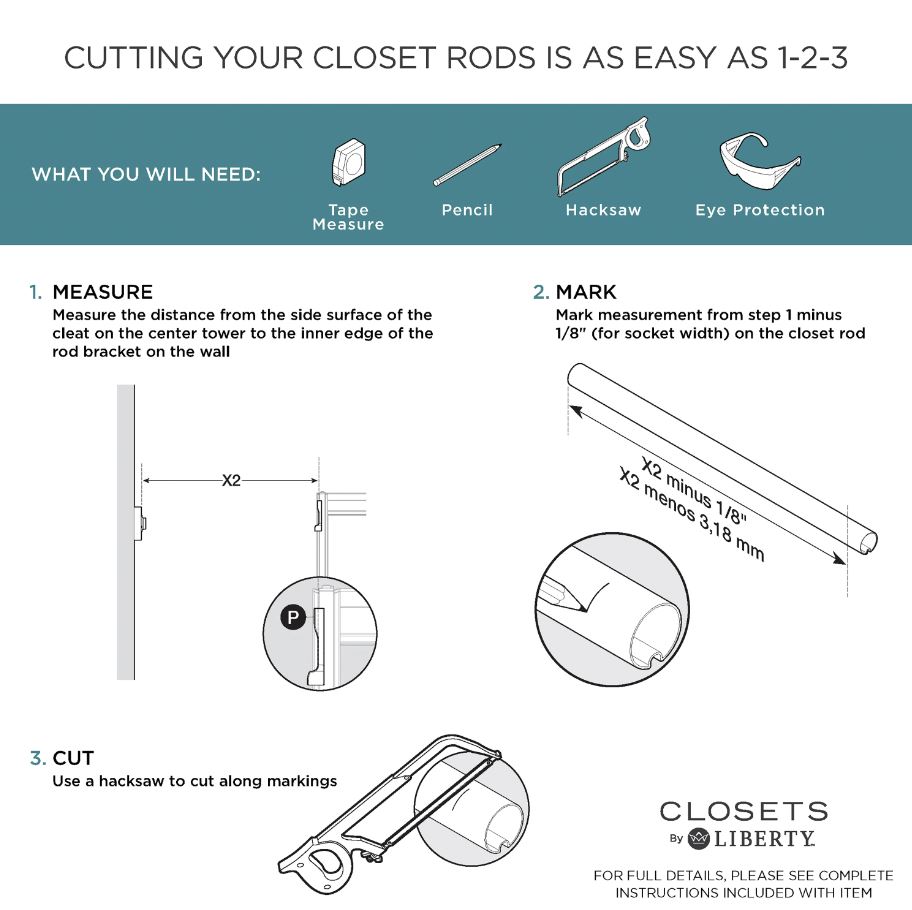
- When attaching the clothes rod bracket to the top of your system, you’ll notice there are four holes. Use the inside holes. The outside holes are for the tower positioned to the left or right and will be the “inside holes” for those towers.

Looking for more assistance?
Check out our installation video for more helpful information.
If you have additional questions about choosing the right Closets by Liberty™ system, review our FAQs or contact our Customer Care team.
1-866-264-1964
support@closetsbyliberty.com
Monday through Friday, 8am-5pm EST